


Quick Links
-
The field of hope and dreams
-
-
Castle Town Visit #1/Silver Card
-
Deltarune has been in development for a long time, and after waiting for four years, the content in the game has doubled, so there’s something to do.
Toby Fox undertailed with the idea of locking you out of content based on your choice, and Deltarné received the same treatment, but not so much.
You can go back and get something from the previous chapters you may have missed, and you know that you know these one-off collectibles and battles that you’ve been trapped later.
I list all the slightly important and missed things that are in order, as they may be useful later and may appear soon in chapters 3 and 4.
???????
Glowshard #1

The first thing you can miss is also the first item in the game. Once you enter Chapter 1’s Dark World, you will encounter a fork on the road and inspect the walls towards the bottom.
All chapters have one of theseand they can be used to avoid spare the rudin instantly, but they will increase the price with each new chapter, so It would be better to sell it in Chapter 6 or Chapter 7.
The field of hope and dreams
Broken cake/spin cake
Broken cakes are easily found in the main path, but they cannot be eaten. Instead, if you find Marius in the Scar Colored Forest, have him fix it, then backtrack it to the top chef where you found it, or wait until Chapter 2 Castletown.
The top cake is very strongit is a one-time use, So giving it to the top chef in exchange for an infinitely renewable spin cake is a decision that will pay off in the long run, especially as each chapter becomes stronger.
White ribbon

The white ribbon is hard to miss and you can be in your chest from the moment you enter this screen into the field of hope and dreams, but it is important that you go down and left to grab it and hold it later.
It simply increases defense and makes Larsei say adorable things when you equip him with it, but later Once you get another ribbon, you can blend them together to create an incredible item.
Broken key c
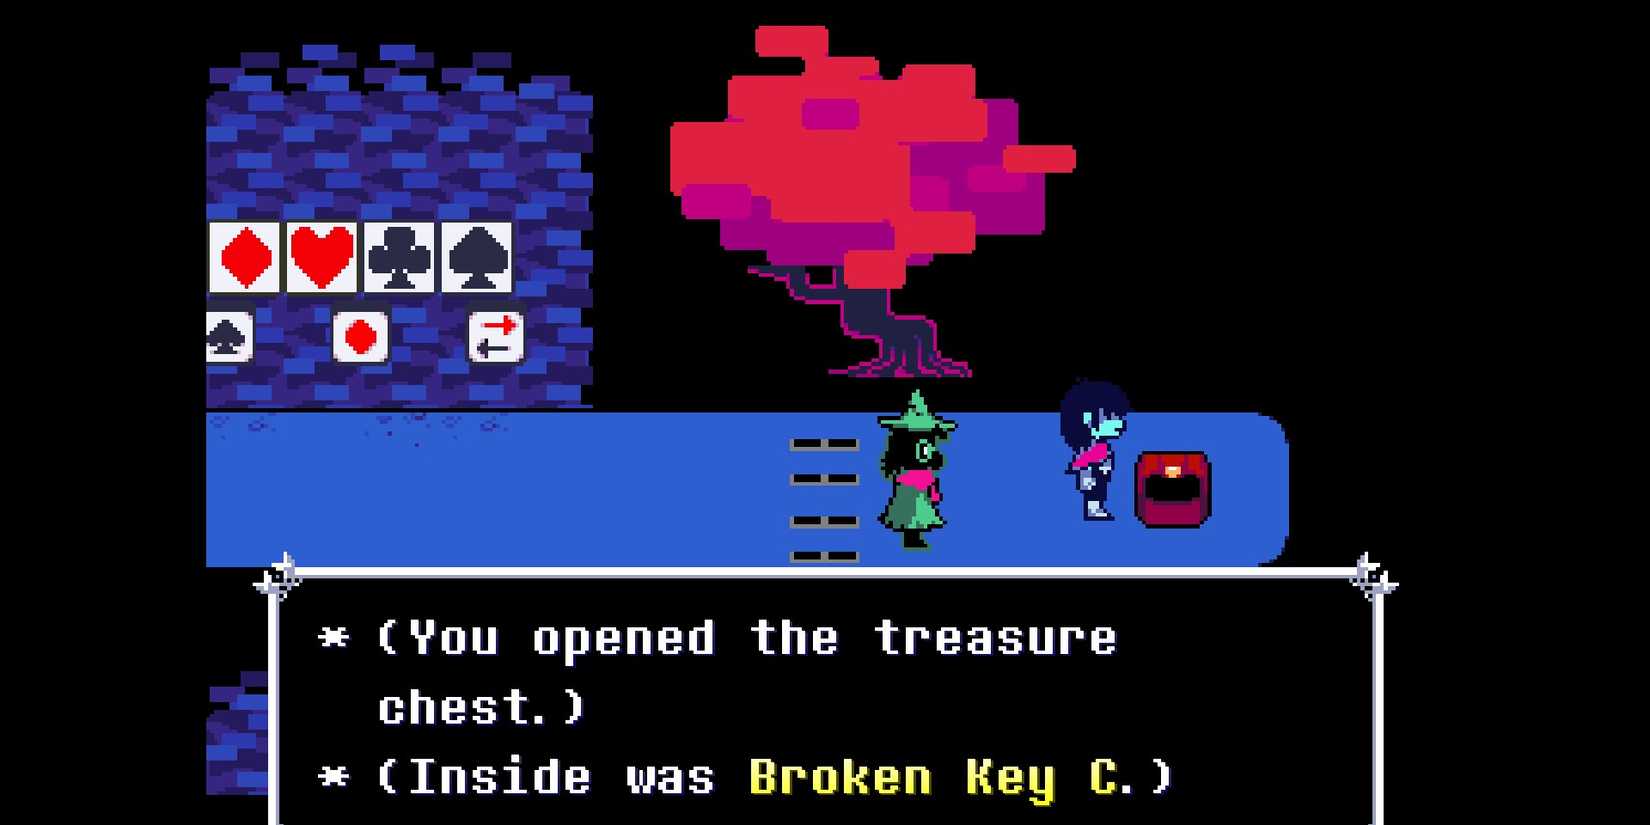
This will become important later in the chapter that takes on Jevil, so you can also get it now, avoiding backtracking. The third important ingredient is accessed from the code in the room above the entrance to the chessboard.
To reach the chest, you will need to enter a diamond, heart, club and spade pattern. This is the same pattern as presented at Card Castle, but you can enter it before you get there.
scar colored forest
Ragger

Shortly after eating a little salsa from a tree stump and recovering from the stage you think the undertail is shrinking, you will encounter an enemy swinging a diamond around in a circle pattern.
Move in sync with the diamond and find the rag arrogance towards the upwards. This is an attack item from Larsei that has very poor attacks, If you want to defeat Jevil with violence, this is the way to go.
Dice brace

After Lancer and Susie take the blueprint, there is another suit pattern puzzle in the next room, and you can find a solution in the same room, They say it’s a spade, a diamond, a club.
This gives you +2 DEF for every character, and most other defensive options are pretty bad, which makes it very useful for the rest of Chapter 1.
Broken key b

This part of Jevil’s key is pretty incorrect as you need to go down the invisible path at the bottom of the Dancer Square as you need to go to the room where you dodge all the dancers, and you need to go down the bottom right where Revivemint is.
This will result in a very rude encounter with three raviks, going to a room facing the path where you can grab a broken key B.
Star Walker/Egg #1
These two are in the same room, so we’ll show you how to do both. You’ll walk through the room where the flying star shoots projectiles at you, then head backwards to talk to the former Starwalker.
Go to the next room and return to Starwalker’s room, repeat until it becomes a room with a lonely tree. Dialogue with the top of the tree, talk to the man, accept his offer, get the egg, It’s not that important, it’s not that important.
Iron shackle/moss

After you’ve been thrown into prison, you can quickly grab the iron bondageit’s a seemingly amazing item that gives you extra attacks and defense, and this somehow is one of the best items right now. If you want moss, there are moss too.
Later, when I arrived at Castletown in Chapter 2, You can fuse the iron shackle with the wrist of the glow to create a spike band. This will allow you to have less defense in exchange for more attack power.
Card Castle
Broken key and / displayed
I went back to the elevator that took you out of prison and interacted with the button. You see the new one ??????? options are displayed, I’ll take you all the way to the basement.
After interacting with the door, you return to Seam’s store, get the last broken key part from him and buy at least two amber cards while you’re there. Let him fix it to head to Marius, and you will be ready to fight.
We definitely stock health items If you don’t have one yet, get a spin cake, And before entering, all party members will be equipped with defensive items, including the Amber cards from Seam’s stores.
Either way, you’ll get the Shadow Crystal, so you’ll need to choose here, but there are two mutually exclusive items from Jevil.
If you fight him, you get a demon knife that can only be equipped by Susie, and it’s good if her extra attacks, magic, and she is your main source of damage.
If you instead tire him and use Lalsei to soothe him, you can properly boost your attacks, magic and defense, and are generally a better option.
Amazing scarf/Brave x

Rouxls Kaard comes with you in Chapter 2, but he was too rude. He couldn’t set up his shop with Banger Music anywhere else, making exclusive items for Brave x and Scarred Scarf Chapter 1.
At this point, nothing good is done, so x is simply a good weapon for Susie. However, Scarf loses his attack in exchange for magic to L’Arsei and as a dedicated healer, it’s an incredibly good deal.
Branching route

This is probably the point where you need to make a big decision. It’s not as blatant as Undertale’s unawakening route, but Deltarné’s route branches out by killing at least one enemy or spareing all enemies.
This gives a slightly different outcome when the king is carried to his subject or falls asleep by Larsei. Given how the strange routes evolve in Chapter 2 and the three undertail routes evolve, I think we should make two different saves for violence or pacifism, as commitments to either may be important later.
If you want to go on the pacifist route but accidentally hurt Susie only one of the enemies, you can find that enemy in their room in the Card Castle and apologize to them.
In any case, once you return to Light World, you will not have a save point. Returning to Chapter 2, when you exit the chapter, you will be locked in new options for the saved file.
Chapter 1 Light World
Please visit everyone
Before going to the next chapter, There are some interactions in the short light world segment of the first chapter that you can keep you out Some very cool interactions in Chapter 2 if you don’t launch them now.
Talk to Undyne, confirming that she doesn’t even know Alphys, visit the hospital Rudy and visit the bunker at the bottom of the town, which happens to be playing the noise of entry #17 but slowing down 666%.
Apart from that, you need to talk to your brother and say yes to him to wander around with his brother.
Optionally, you can talk to Asgoa, then go to the back of his shop, interact with the fridge and place the eggs inside for a while. There is no clue whether this is something you should do with eggs, but I chose to do it because there was something similar to Chapter 2.
If you want a fun scene at the beginning of Chapter 2, tell Noel by the gate, tell her about Susie and tell her that she’s eating chalk. After this, you can wash the toilet dozens of times before falling asleep.
Chapter 2 Dark World
Castle Town Visit #1/Silver Card
There aren’t many important things to do in Castletown right now, as you can visit later, but there are a few things. That is, an exclusive dialogue from Toriel and Alfis, and an exclusive seam dialogue about Jevil, when heading down with a garbage orb.
Apart from that, you can finally access some extended storage, Make sure to store glow fragments and other items you want to storefuse two amber cards into silver cards and add extra money throughout Chapter 2.
Cyberfield
Growlist

As the first item in the dark world, suitable item, Glow’s wrists are very easy to find just by going to the right of the route before the first teacup rideand gives a decent +2 def.
This is a great alternative if you lose one of your amber cards due to your previous silver cards, but otherwise it’s best to use as a fusion with prison bondage when you return to Castletown.
Textile scarf

After Ralsei provides a quick tutorial on the outcome of the violence, head right and right to solve a simple puzzle that spells Apple. and Nuberto. Nubert is there too.
The fiber scarf gives +2 attacks and +2 magic. This may seem better than a canned scarf. If you use ralsei for attacks, that’s true, but take that into consideration, as the fiber scarf still gives bonus healing that the fiber scarf doesn’t have.
Glorist 2/Blue Checkmark 1
You probably don’t need a second glory list, but this breast is still a bit important. Talk to the man with a green mouse pointer and leave with someone selling bagels after the room. He leaves it to find the blue checkmark.
Immediately after that, head towards the first set of falling bars and move down to find Glorist’s chest along with the first blue checkmark. If Twitter is okay with anything, this is certainly a sign of evil.
Blue checkmarks 2 and 3

The second and third blue check marks are in the same room. You will come across three different teacup rides. The third moves further into the cyber world, while the first two are free rides to more checkmarks.
The first is to write about Giasfelfebrehber. This is very easy to start at the top left and head down, with the second on the chest. Go back and talk to the hacker guy, and he later ends up in Queen’s Mansion and the town of castles.
Mecha knows/automatic x

Once you dance with everyone, you can go out to their store and get two pretty decent weapons: Chris’s Mecha Saber and Susie’s Auto Axe.
Mecha Saber is currently the best weapon in the game for Chrishowever, considering that he chose to attack Jevil instead of getting the Devil’s tail, automatic ax is much worse than the Devil’s Knife.
Tension bit

In the room after the shop with a dancing save icon, you can go up to the right and head down much further down for the tension bit.
That’s great, but Do not use this in combat. You can blend it with items you will get later to create one of the best accessories in the game.
2

On the next very large teacup ride, all arrows need to be locked and hit. If you can get all 70, Ragger 2 will be rewarded.
This is a direct upgrade to Ragger from Chapter 1, a drawback of extremely high attack stats and reduced magic. Even No Mercy Run, I would honestly recommend still against it, but if it’s your style, go for it.
Cyber City
New save

After Chris is split up with the others, you can start a strange route. I prefer to start a new Save that is completely dedicated to running No Mercy Run, but I can copy Save here as a starting point.
After completing the main route, proceed to the route in detail, but with Noel to freeze all enemies and many dialogue selections, some items are mutually exclusive to either route.
Pink ribbon

You and Virovirokun advance to Noelle about how the fight works, head left and there is a small alley with pink ribbons.
No matter which route you are, you should definitely get this. Not good for defense, but you can get a lot more TP for spells and healing, along with a big fusion later.
As an aside, everything you equip Noel will become inaccessible once you arrive at Castletown.so if you give her a pink ribbon, make sure you get it back before you leave the cyber world.
Bounce Blade

You can head to the bottom in the same room where you can get delicious shoes and Noel flavored tea. After passing Virobilokun, open your chest and get a bounce blade.
It may seem bad at first that there are significantly fewer attacks than Mechasabers, but it has the advantage of giving it a +1 defense, and as a big fan of blade bounce, it appeals to me.
Moss 2/Egg 2
While in the traffic room with red and yellow cars, pass the red car, then press both buttons and head right towards the small corridor with warning signs. While the yellow car is still in a stop, head further down and enter the hallway on the left.
Head to the room on the left and be ogled by Toby Fox himself, then you will be in a room with free moss. Just like the egg room in Chapter 1, leave this room and re-enter until in another room there is another tree and another man says yes and gives another egg.
Car NPC

This is small and stupid, Dodging all the cars while driving with Queen and Noel will bring a small car NPC back to Castletown. The easiest way to do this is to hold it on the left and right sides at the same time. If you can’t do that, L.
Queen’s Mansion
Big Shot Bowtie/Royal Pin

After an incredible long time without the option to get your grab, you can enter the cafe at Queen’s Mansion. There you can buy both big shot bowtie and royal pins.
Royal Pin is simply a very good armor for any character, and while the big shot bowtie is slightly overwhelming in comparison, It’s an important fusion material later, so grab it now.
keygen/broken sword

As you’re near the door for a fast travel, it’s as good as going back to the garbage dump, head left and enter the Spamton store. You can talk to him first and then buy things.
Please buy some keigen from himand make sure you press the button. That way, don’t spend $48132. You can also grab a broken sword and a worn bowtie, which is not of much use now, but may be a future.
Chain Mail/Basement
After meeting a tall cat woman with a whip, this game gently reminds me that the audience knows and after crossing the traffic, you run into a hacker. He talks about the backdoor in this room.
First of all, the chest here contains a chain mail. Chain Mail simply gives you three defenses, especially better than most other armor in that stat. To reach the backdoor, follow the hacker and then interact with the object that points to as the cursor changes to your hand.
Here you can unlock the gate and activate a shortcut to the main room. Enter the basement on the right, head left, power the Forcefield and get on the most intense teacup of your life. When I prepatched it, it was tough, worry.
Go back and head right and eventually come across Mettanneo’s lively body with an empty disc. You’ll take this to Spamton later and start another super boss.
Glowshard #2

Upon climbing the Queen’s Mansion, Butler chases after him and comes across a room chased by a pot. You can either ignore them or just meet them, but either way, head to the first dark door you’ll see in this corridor.
Interacting with one of the Claus here will generate UFO enemies that will shoot you, but interacting with all enemies while plagued by bullets will become another shrapnel of glow to hide until later chapters.
Spamton Neo
We are us before heading to the bottom floor to fight the Queen on the shortcut. Go back to the garbage dump and show Spamton the empty disk. He loads himself up for use in the basement.
Prepare some of the great soothing items and revivals you’ve ridden in lead-up to the Queen, then return to the robot body, find an empty disk and put it in a new disk, then leave the room and start bossing.
The fight isn’t as difficult as Jeville. In particular, it is a free healing experience from pushing F1. But like him, you need to choose here. You can spare him by cutting his strings and getting a deal maker, or you can attack him and get a puppet scarf instead.

Dealmakers are great armor that gives you 5 defenses, 5 magic and 30% extra money from each battle, and can be further equipped. Puppet Scarf is an upgraded Ragger 2, which gives you an additional attack of Ralsei 10 at the expense of six magic.
Unless you’re incredibly devoted to murder, We recommend using violence here Healing on the ground of the puppet scarf nerf thral sei and having excellent defensive items is certainly a big shot in winning most battles.
Either way, at the end of things, there are cool new items and shadow crystals that will become important later. If you had a shadow mantle, you can get the third one in the next chapter…
There should be nothing else left to enter the dark world, but in contrast to Chapter 1, if saved in Castletown, you will not be able to return to the cyber world and play the entire chapter to get something else.
Castletown 2nd visit
Chapter 2: All Stars and Fusion

Now that I’ve sealed the fountain, I’m back to Castletown now to have fun dialogue with new chapter 2 recruits and some fun dialogue with a mountain of all the new items, mostly of all the fusions I’ve gasped.
First of all, you have at least one fight left. The first round is not difficult, but fighting two Werewires at once is difficult, and is best done by constantly grazing to build TPs to heal.
This causes the tension gem to apply tension. This is similar to a bit of tension. This is another TP restore item, but I feel very strong when it becomes another used item that I will need for fusion later.

Speaking of fusion, Head to the Top Bakery and fuse the ribbon into twin ribbons and optionally a glowlist and iron shackle with spike bands, making the big shot bow and tension a bit into the tension bow.
The twin ribbon is an incredible accessory that further increases the range of Graze, along with three defenses. The tension bow is especially good when combined with the ribbon. This is because it provides additional TP gain along with two extra defenses.
Glorists trade defense for attack power. DD burgers are better groceries if you have a dark burger. The twisted sword is currently unexplored, but it’s just an odd route exclusive.
While you’re here, you can head to the cafe and admire the slightly different swatch sprites in the LTS demo version and see if you’ve got all the recruits.
Stop by Seam’s shop for a more exclusive conversation, including vague hints about Secret Boss in Chapter 3. Watch the cutscene between King and Queen and this time get out of the dark world.
Chapter 2 Light World
I’ll visit everyone again
After that, there is even more business in this world of light. Visit Rudy, he meets Susie for the first time, talks with Undain, delivers her chocolate box to Alfie, and heads to the cemetery for a small scene with Father Alvindefinitely not a knight.
You can definitely head to the new scene with Gaster-Adjacent Bunker and stop by Sans’ Shop to delay the brothers’ stuff. Deposit the eggs in a basket of other eggs.
Maybe knock again on Mettaton’s estimated door and say you’re there to meet someone else. While you’re there, sit by the beach again and get a vague foreshadowing in your system.
You can then return home by fully knowing that you have a maximum completed pacifist saved file ready to go to the next few chapters. Be sure to watch so that the ending credits are saved.
Strange route
Start by chance

If you want to play a strange route (also known as Snowgrave Route), continue. Otherwise you’re done. This route begins when you acquire Noel on a team in the Cyber World. So far, nothing you’ve done.
Once she joins your party, backtrack as much as possible. Noel protests to this, but continues to ignore her and moves left. Using her abilities, the ice impact is only to kill and freeze all enemies. You can’t miss one, so check every bit of every room for the enemy.
Freeze Werewire and Virovirokun at the Spamton shop, listen to a bit of sound effects and you’re on the route. Next, select “Continue” and continue using the ice impact, killing or sparring enemies normally will abort the route.

Freeze all enemies in a particular room and you will hear the same sound effect. If you hit the annoying mouse room, ignore the puzzle. Instead, try leaving the room. Ignore Noel until you are given two options, then select Continue.
Once you reach your room with your Ferris Wheel Billboard, consult with the shopkeeper on the right and when prompted, answer “We are something else.” If you are not offered a ring, freeze around all enemies you can find in this room and return to the shopkeeper.
Freeze the ring
After leaving, the shopkeeper should ask if he is interested in freeze rings. Answer “Get” to all dialog promptseventually Noel uses her power to get the ring, which cuts off from her memory.
If you want this route to be even more nervous, go to the sign and request Noel ride with you on the Ferris Wheel. Then, when Noel goes down to the switch and talks about strange feelingsTell her, “That’s natural.”
The rest of the route is pretty simple. Equip Noel with a freeze ring, and impact all enemies with ice, “Continue” to answer all dialog prompts You will be given until you reach the trash can where you previously found eggs and moss.
Thorn ring
Please consult the trash can. Spamton will tell you about the rings you can get once you’ve killed all your enemies. Zero this counter and talk to Spamton again before you go to your room with an amazing battle.
Your last enemy should be one of the pottaps in the room with lots of garbage cans, so freeze it and return to Spamton. He sells you Thorn Ring for $1997.
Snowman cancelled

If necessary, stop at this point and sparr suspiciously. This will play the rest of the route as normal, but you can take the Thorn Ring from Noel and keep it for yourself. This is the only way to hold the ring and may help with twisted swords in the future.
snowman
Of course, if you’re here to go along with the route, freezing the bottom is the final step. Don’t use ice shocks on him. Instead, they build TP with 100% defensiveness and order Noelle to use her new move, SnowGrave.
She refuses several times, But keep ordering her to throw Snowgrave. She then freezes him with a large ice diamond and kills him surprisingly, then walks off the screen without breaking out of this route.
Spamton Neo DX

When you get up, you’ll see that you actually ran half of the runtime in Chapter 2 and did it. The castle is completely overrun, most rooms are blocked and completely trapped from a lot of items.
After you have climbed the maze of Pipis and avoided fighting the Queen completely, you will be on a straight path to Spamton Neo. There’s not much you can do to prepare for this other than taking it from the vending machine.
In all Spamton battles, you can press F1 to instant heal once per file that saves F1. In particular, we recommend focusing on using defense and X-Slash while replenishing your health frequently.
Once his defense rises, he just acts and asks for help, and Chris cannot get Noel’s attention, but you certainly do. Its chilly finish allows you to seal the fountain and return home.
move on
The light world is almost the same, but visiting Rudy in the hospital can remind you exactly what you’ve done to Noel’s spirit. IYou want to surprise her even more, walk towards her, wear her watch in cutscenes.
Apart from that, you have a true pacifist save, a strange route save, and perhaps aborted strange route save. Don’t forget to watch the end credits again and continue with your completion data until Chapter 3.


